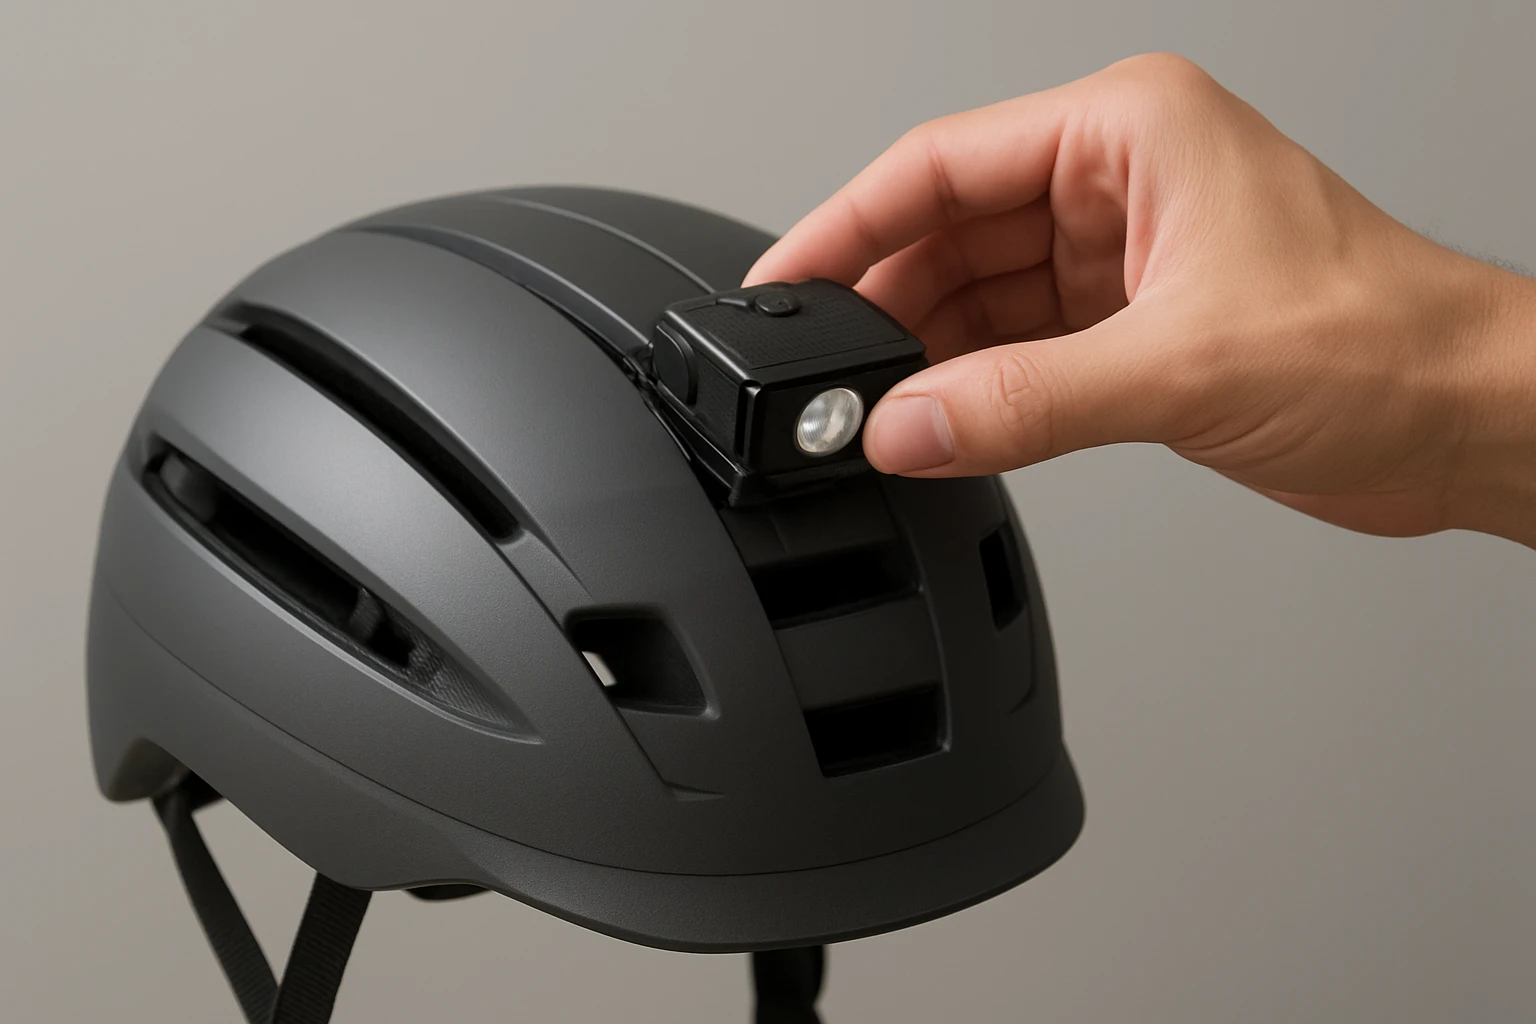
How to Attach a Helmet Light to a Foldable Helmet: Step-by-Step, Safe, No‑Drill Guide
Introduction
Attaching a reliable light source to a foldable helmet can dramatically improve visibility during night‑time cycling, hiking, or emergency response. This guide will teach the reader how to accomplish the task without modifying the helmet structure, preserving its original integrity and warranty. By following each numbered step, one will achieve a secure, adjustable lighting solution that remains functional even after repeated folding and unfolding cycles. The method relies on commercially available accessories that are inexpensive, durable, and designed for a wide range of helmet shapes.
Readers will also understand why certain products outperform generic alternatives, and they will receive practical tips for long‑term maintenance. The approach described is suitable for both recreational users and professionals who require hands‑free illumination in demanding environments.
What You’ll Need
- LHKNL Rechargeable LED Headlamp 2‑Pack – Ultra‑light, waterproof, 8‑mode headlamp ($17.99, 4.5★/5 based on 34,893 reviews).
- Nightstick XPP‑5465R Helmet Flashlight – Intrinsically safe, 360‑lumens, helmet‑mountable ($122.95, 4.6★/5 based on 180 reviews).
- Haulonda Hard Hat Helmet Clips 8‑Pack – Lightweight, universal clips for narrow‑edged helmets ($6.99, 4.5★/5 based on 341 reviews).
- Small flat‑head screwdriver (optional for adjusting clip tension).
- Cleaning cloth and isopropyl alcohol to remove dust from mounting surfaces.
Step 1: Choose a Compatible Light Source
The first decision concerns the illumination device itself. For most outdoor enthusiasts, the LHKNL Rechargeable LED Headlamp 2‑Pack provides an excellent balance of brightness, battery life, and cost. Its 1500 mAh rechargeable battery delivers 4–10 hours of operation, and the eight lighting modes include a focused beam, wide flood, and red safety light. The motion‑sensor function allows the user to toggle the lamp without removing gloved hands, a valuable feature when the helmet is already secured.
Professionals who require intrinsically safe equipment, such as firefighters, may prefer the Nightstick XPP‑5465R Helmet Flashlight. This model delivers up to 360 lumens, complies with NFPA‑1971‑8 standards, and includes a rear‑facing green safety LED that signals team members. Although more expensive, its durability and certified safety make it appropriate for hazardous environments.
Both devices feature a standard headlamp band that can be looped through a clip, allowing them to be repurposed for helmet mounting without permanent alterations.
Step 2: Prepare the Foldable Helmet
Before any accessory is attached, ensure the helmet surface is clean and dry. Use a lint‑free cloth dampened with isopropyl alcohol to remove oil, dust, or sweat residues. Allow the surface to air‑dry for at least one minute. This preparation prevents slippage of the clips and maximizes the friction between the clip’s groove and the helmet shell.
Inspect the helmet’s folding mechanism. Verify that the hinge pins move freely and that no cracks or loose sections exist. A compromised helmet could fail under the added weight of a light, endangering the wearer.
If the helmet includes a removable liner, detach it temporarily. This step provides unobstructed access to the outer rim where the clips will be positioned, and it reduces the risk of the liner interfering with the clip’s grip.
Step 3: Attach the Haulonda Helmet Clips
Open the package of Haulonda Hard Hat Helmet Clips 8‑Pack. Each clip weighs only 0.1 oz and measures 4.6 cm in length, making it virtually invisible when installed. Select two clips for a balanced installation—one on each side of the helmet near the front‑temple area.
Slide each clip around the narrow edge of the helmet shell. The clip’s spring‑loaded jaw will snap into place, creating a secure groove. Ensure the open side of the clip faces outward so that the headlamp band can be inserted easily. If the clip feels loose, gently press the jaws together with a flat‑head screwdriver to increase tension.
Because the clips are designed for narrow‑edged helmets, they will not interfere with the folding hinge. The lightweight construction ensures that the added mass does not affect the helmet’s center of gravity, preserving comfort during prolonged wear.
Step 4: Secure the Light to the Clips
Take the headlamp band from the chosen light source. For the LHKNL Rechargeable LED Headlamp, the elastic band is adjustable from 12 cm to 22 cm, accommodating most adult head sizes. Thread the band through the groove of the first Haulonda clip, then pull it snugly around the helmet’s front‑temple. Repeat the process with the second clip to achieve a symmetrical mount.
Adjust the band tension until the lamp sits firmly without wobbling. The LHKNL lamp head can rotate 60°, allowing the user to direct the beam upward for road illumination or downward for close‑range tasks. If the Nightstick model is used, its built‑in clamp can be positioned directly onto the clip’s flat surface, providing an even tighter connection.
Verify that the light’s switch remains accessible. Both recommended lamps feature a single‑button operation that can be pressed with gloved hands, ensuring that the user does not need to remove the helmet to adjust brightness.
Step 5: Test Alignment, Battery, and Waterproof Integrity
With the light mounted, power on the device and cycle through its modes. Confirm that the beam covers the intended field of view and that the red safety mode is functional if required. For waterproof confidence, simulate light rain by spraying a fine mist onto the helmet and lamp. The LHKNL headlamp’s IPX4 rating protects against splashing, while the Nightstick’s IP‑X7 rating tolerates temporary immersion up to 1 m.
Check the battery indicator on the LHKNL lamp; a full charge should display a green icon. If the indicator shows low power, connect the USB‑C charger for a few minutes and retest. The Nightstick model uses replaceable 123 lithium batteries; ensure a fresh set is installed before the first use.
Finally, fold and unfold the helmet several times to confirm that the clips remain seated and that the lamp does not shift. The lightweight nature of the Haulonda clips ensures they do not hinder the folding mechanism.
Tips & Pro Tips
- When using the LHKNL headlamp, select the motion‑sensor mode for hands‑free activation in cold environments where gloves are thick.
- For extended night trips, keep a spare set of Haulonda clips in a waterproof pouch; replacement clips cost less than $7 and can be swapped in minutes.
- Mount the Nightstick flashlight on the opposite side of the helmet from the LHKNL lamp if dual‑light coverage is desired; this arrangement balances weight distribution.
- Periodically clean the clip’s contact surfaces with a dry brush to prevent dust buildup, which can reduce grip over time.
- If the helmet includes a vented crown, avoid placing the clip directly over the vent to preserve airflow and prevent condensation.
Troubleshooting
| Problem | Possible Cause | Solution |
|---|---|---|
| Light slips during movement | Clip not fully engaged or band too loose | Re‑seat the clip, tighten the band, and test again. |
| Battery drains quickly | High‑lumens mode used continuously | Switch to lower‑lumens or red mode when full brightness is unnecessary. |
| Water ingress observed | Damaged seal on headlamp housing | Replace the headlamp; both LHKNL and Nightstick carry warranties. |
Conclusion
By following the outlined steps, one can attach a high‑performance helmet light to a foldable helmet without drilling, preserving the helmet’s original design and safety certifications. The combination of Haulonda Hard Hat Helmet Clips with either the LHKNL Rechargeable LED Headlamp or the Nightstick XPP‑5465R Helmet Flashlight creates a reliable, adjustable lighting system suitable for recreational and professional applications. Regular maintenance of the clips and battery will ensure long‑term performance, allowing the user to focus on the task at hand rather than equipment concerns.
Products Mentioned in This Guide
Frequently Asked Questions
Can I attach a helmet light to a foldable helmet without drilling?
Yes, using adhesive mounts or strap‑on brackets lets you secure the light without altering the helmet.
What type of mount is best for a foldable helmet?
A low‑profile, removable adhesive pad with a quick‑release clip provides a stable fit that survives folding cycles.
Will adding a light affect my helmet’s safety certification?
No, as long as you don’t drill or modify the shell, the helmet retains its original safety rating.
How do I keep the light’s battery lasting longer?
Charge the LED headlamp fully before each use and store it in a cool, dry place when not in use.
Are there specific lights recommended for foldable helmets?
Rechargeable LED headlamps with a slim profile and strong adhesive base, such as the LHKNL 2‑Pack, work well on most foldable helmets.