Introduction
This guide explains how one can safely disinfect a foldable helmet, preserve its structural integrity, and maintain hygiene for repeated use. The reader will learn which materials are suitable, how to apply cleaning agents without damaging the shell, and how to protect the helmet against future contamination. By following the outlined procedure, one reduces the risk of pathogen transmission while extending the service life of the helmet. The information is valuable for commuters, cyclists, motorcyclists, and anyone who relies on a compact protective headgear.
What You'll Need
- A clean, well‑ventilated workspace with a soft surface such as a towel or mat.
- Soft microfiber cloths for wiping and drying.
- Gentle soap or a dedicated helmet cleaning foam.
- Motorex Helmet Care Spray – a foaming cleaner that deodorizes and protects helmet shells.
- DIY Home Disinfectant Guide – provides recipes for hands sanitizer and disinfectant wipes suitable for helmet interiors.
- Disposable gloves to protect one's hands during the cleaning process.
- Optional: a soft brush for stubborn debris.
Step 1: Prepare the Workspace
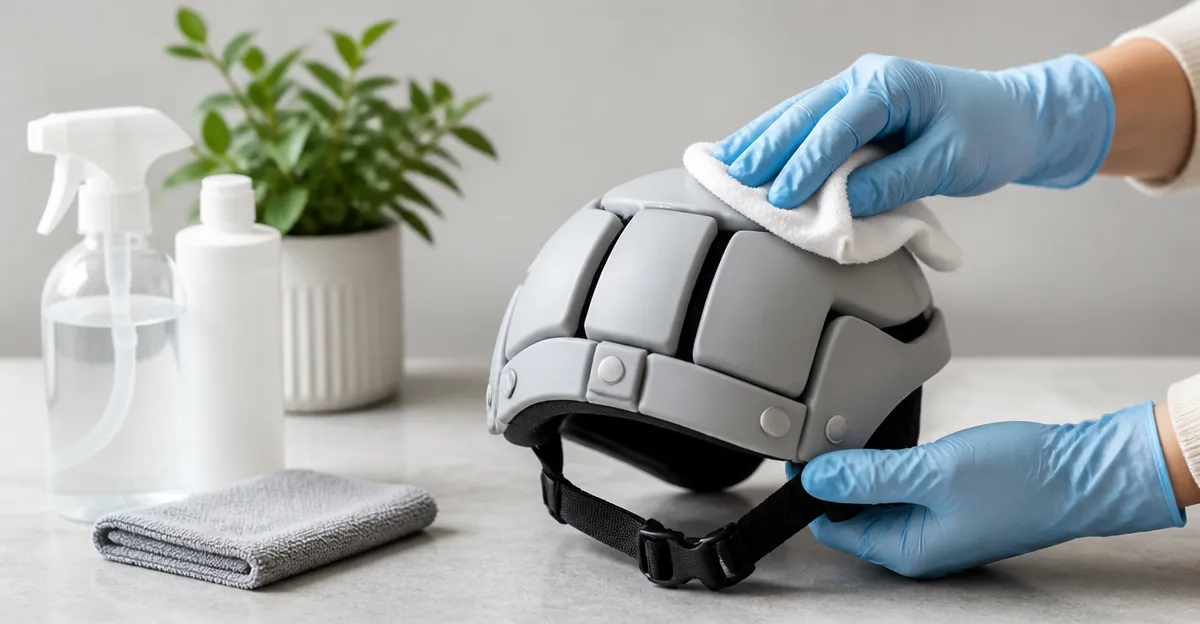
Begin by selecting a flat surface that will not scratch the helmet shell. Lay a clean microfiber towel on the surface to cushion the helmet and absorb any excess liquid. Ensure the area is well‑ventilated, especially when using cleaning foams that may emit mild vapors. Remove any loose items from the vicinity to avoid accidental contamination of the helmet.
Step 2: Disassemble Removable Components
Most foldable helmets feature removable padding, interior liners, and adjustable straps. Gently detach these components according to the manufacturer's instructions, taking note of how they reattach later. Place the removed parts on a separate towel to keep them organized. This step prevents cleaning solutions from seeping into mechanical hinges, which could impair folding functionality.
Step 3: Remove Surface Dust and Debris
Using a dry microfiber cloth, wipe the outer shell to eliminate loose dust, sand, or pollen. For stubborn particles, employ a soft brush in a circular motion, being careful not to press too hard on the surface. This preliminary removal reduces the likelihood of scratching when the cleaning foam is applied. At this stage, the helmet is ready for a thorough cleaning without risk of embedding grit.
Step 4: Clean the Helmet Shell with a Dedicated Foam
Apply a modest amount of Motorex Helmet Care Spray to a clean microfiber cloth rather than directly onto the helmet. The product is formulated to clean, deodorize, and protect helmet shells without degrading the composite materials. Its foaming action lifts grime while a protective layer helps maintain color vibrancy. Gently rub the foam‑covered cloth over the entire exterior, paying special attention to creases and hinge areas where dirt accumulates.
The foam evaporates quickly, leaving a fresh fragrance and a thin protective film that repels future stains. Because the spray is safe for both the outer shell and interior padding, one can also lightly mist the interior surfaces if they are not heavily soiled. Allow the helmet to air dry for three to five minutes before proceeding to the sanitizing step.
Step 5: Sanitize the Interior and Contact Surfaces
While the cleaning foam addresses visible grime, pathogens may remain on the interior foam and strap closures. The DIY Home Disinfectant Guide provides recipes for homemade disinfectant wipes that are safe for fabric and foam. Prepare a batch of wipes using a diluted solution of isopropyl alcohol (70%) and a few drops of gentle soap, then soak a clean cloth and wring it to a damp state.
Wipe the interior lining, removable padding, and strap buckles with the prepared cloth, ensuring each surface is evenly moistened. The alcohol concentration is sufficient to inactivate most viruses and bacteria while the soap prevents material degradation. Avoid saturating the foam, as excess moisture can lead to mold growth. After wiping, let the interior air dry completely; this typically requires fifteen to twenty minutes in a well‑ventilated area.
Step 6: Dry and Inspect the Helmet
Once the cleaning and sanitizing phases are complete, use a dry microfiber cloth to remove any residual moisture from the exterior. Inspect the helmet for missed spots, especially around hinges and strap attachments. If any areas appear damp, allow additional drying time before reassembly. Proper drying prevents water‑induced weakening of adhesives and ensures that the protective foam retains its impact‑absorbing properties.
Step 7: Reassemble and Apply a Protective Layer
Reattach the interior padding, liners, and straps exactly as they were removed, confirming that all fasteners click securely. For added protection, one may apply a thin layer of the Motorex Helmet Care Spray to the exterior once more, this time focusing on a protective coating rather than cleaning. The spray forms a barrier that resists future dirt adhesion and helps preserve the helmet's color.
Finally, store the helmet in a breathable bag or on a rack, away from direct sunlight and extreme temperatures. Regular maintenance, performed at least once a month, will keep the helmet hygienic and ready for safe use.
Tips & Pro Tips
- Test any cleaning solution on a hidden area first to confirm material compatibility.
- Do not use bleach or harsh chemicals, as they can weaken composite fibers.
- When folding the helmet after cleaning, ensure all hinges are completely dry to avoid rust formation.
- Rotate the helmet's position in storage to prevent prolonged pressure on a single spot, which could cause deformation.
- For helmets with removable visors, clean the visor separately using a mild glass cleaner and a lint‑free cloth.
Troubleshooting
Problem: Persistent odor after cleaning.
Solution: Apply a second light mist of Motorex Helmet Care Spray and allow the helmet to air dry in a shaded area. The product contains a deodorizing component that neutralizes lingering smells.
Problem: Stiff hinge movement after drying.
Solution: Lubricate the hinge with a small amount of silicone‑based lubricant designed for plastic components. Wipe away excess to prevent slippage.
Conclusion
By following this comprehensive guide, one can effectively clean, sanitize, and protect a foldable helmet without compromising its structural performance. The recommended products – a specialized cleaning foam and a reliable DIY disinfectant solution – streamline the process while ensuring safety and longevity. Regular upkeep, combined with the pro tips provided, will maintain optimal hygiene and extend the helmet's useful life. One should feel confident that the helmet remains a trustworthy barrier against impact and microbial threats.
Products Mentioned in This Guide
Frequently Asked Questions
What cleaning agents are safe for a foldable helmet’s shell?
Use gentle soap, a dedicated helmet cleaning foam, or a foaming spray like Motorex Helmet Care that is pH‑balanced and non‑abrasive.
How can I disinfect a foldable helmet without damaging its structure?
Apply a mild disinfectant wipe or spray to a microfiber cloth first, then gently wipe the surface, avoiding direct spray on hinges or padding.
Can I use household bleach or alcohol to disinfect my helmet?
No; strong bleach or high‑concentration alcohol can degrade the shell and foam, so stick to approved helmet cleaners or diluted isopropyl solutions (≤70%).
How often should I clean and disinfect a foldable helmet?
Clean after each use if it gets sweaty or dirty, and disinfect weekly or after exposure to potential pathogens.
What workspace setup helps protect the helmet during cleaning?
Work in a well‑ventilated area on a soft towel or mat to prevent scratches and ensure fumes disperse safely.